How to Install a Mini Split: A Step-by-Step Guide for Beginners
- Mini splits are DIY-friendly but require preparation: Homeowners can install single-zone systems with the right tools, but some steps—like handling refrigerant—may still require professional help.
- Proper placement is key: Mount the indoor unit high on the wall for airflow, and ensure the outdoor unit is level and elevated for efficient operation.
- Accurate drilling and line management prevent issues: Drill wall holes at a slight downward angle for drainage, and bundle refrigerant lines, drain hoses, and wiring neatly.
- Vacuum and leak testing are critical for performance: Evacuating air and moisture from the lines and checking connections ensures efficient operation and prevents refrigerant leaks.
- Electrical setup must follow safety guidelines: Use a correctly sized breaker, proper wiring, and connect grounds securely; consulting an electrician is recommended.
- Weatherproofing and final testing ensure long-term reliability: Seal wall penetrations, leave a moisture escape gap, and test both heating and cooling functions.
- DIY installation saves money but requires caution: A successful DIY installation can save thousands compared to professional service, but careful attention to detail is essential to avoid mistakes.
Mini split systems are one of the most popular ways to heat and cool your home without relying on bulky ductwork. They’re efficient, quiet, and versatile enough to work in bedrooms, living rooms, garages, and even home offices. But when it comes to setting one up, many homeowners wonder: Can you install a mini split yourself?
The good news is, yes—you can. While professional installation is always recommended for complex setups or larger homes, a handy homeowner can tackle a single-zone mini split installation with some patience, the right tools, and a good guide. In this article, we’ll walk you through how to install a mini split step by step, covering everything from choosing the right location to connecting the lines and powering it on.
What Is a Mini Split System?
Before we dive into the installation, let’s quickly recap what a mini split actually is. You might be wondering: how does a mini split work? A mini split, also called a ductless mini split, consists of two main parts:
- Indoor unit (air handler): Mounted on the wall or ceiling, this part blows conditioned air into your space.
- Outdoor unit (condenser): Installed outside your home, this part releases or absorbs heat depending on whether you’re cooling or heating.
The two are connected by refrigerant lines, a drain hose, and electrical wiring that pass through a small hole in your wall. Unlike traditional HVAC systems, mini splits don’t require ductwork, making them much easier to install in existing homes.
Can You Really DIY a Mini Split Installation?
Yes—but with a few caveats. Installing a mini split isn’t as simple as plugging in an appliance. You’ll need to drill, run electrical wiring, and handle refrigerant lines. Many systems come pre-charged with refrigerant, but in some cases, you may still need a licensed HVAC technician to finish the refrigerant connection.
That said, if you’re comfortable with power tools and have some DIY experience, you can handle much of the work yourself. This guide will show you how to install a mini split the beginner-friendly way.
Tools and Materials You’ll Need

Before you start installing a mini split, gather all necessary tools and materials. Having everything on hand will make the process smoother and prevent unnecessary delays.
Tools:
- Power drill with hole saw bits (2–2⅛ inches) for drilling the wall hole
- Level to ensure the indoor unit bracket and outdoor bracket are straight
- Stud finder to locate wall studs for mounting support
- Screwdrivers and socket set for securing brackets and connections
- Adjustable wrench and pliers for refrigerant line fittings
- Pipe cutter and flaring tool (if your line set is not pre-flared)
- Vacuum pump and manifold gauge set for evacuating air and moisture from refrigerant lines
- Electrical tester to verify wiring and voltage
- Measuring tape to ensure proper placement of indoor and outdoor units
Materials:
- Mounting bracket (usually included with your system)
- Mini split line set (copper tubing with insulation)
- Signal wiring and drain hose
- Electrical wiring appropriate for your unit’s voltage and BTU rating
- Double-pole circuit breaker and AC disconnect box
- Weatherproof caulk or sealant for wall penetration
- Vibration pads for the outdoor unit (if mounted on a solid surface)
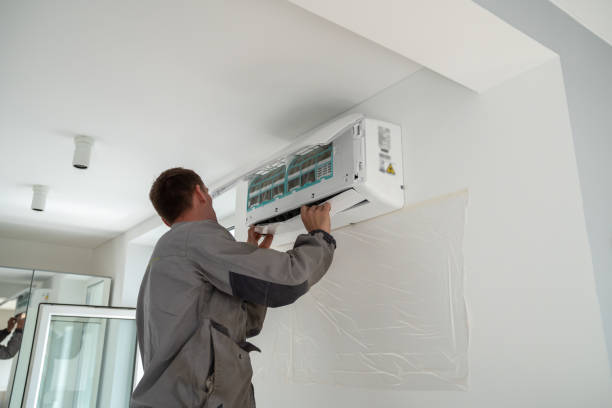
Step 1: Install the Indoor Unit
Start by choosing a location high on the wall, ideally six inches below the ceiling, to maximize airflow. While not strictly necessary, attaching the mounting plate to wall studs provides extra support.
- Use a level to ensure the mounting bracket is perfectly horizontal.
- Drill pilot holes and secure the bracket with the included anchors and screws.
- Prepare the refrigerant lines, drain hose, and signal cable. Straighten the copper lines and attach them to the indoor unit carefully.
- Connect the signal wires to the correct terminals, following the wiring guide included with your system.
- Bundle the lines together neatly with insulation tape to keep them organized and protected.
Step 2: Drill the Wall Hole
Proper placement and angle are critical for drainage.
- Measure twice to ensure the hole aligns with the indoor unit connections.
- Use a 2–2⅛ inch hole saw to drill from inside to outside. Angle the hole slightly downward toward the exterior to prevent water from pooling.
- Feed the bundled line set through the wall carefully, pulling from the outside to avoid damaging the insulation.
Step 3: Install the Outdoor Unit
Position the outdoor condenser on a level surface. Wall-mounted brackets are often more convenient than concrete pads and help keep the unit elevated.
- Secure the bracket to wall studs and make sure it is level.
- Connect the high-pressure and low-pressure refrigerant lines to the condenser. Hold the fittings steady with pliers while tightening to prevent leaks.
- Attach the drain line to direct condensation away from the wall or foundation.
Step 4: Evacuate the Refrigerant Lines
If your system is not pre-charged, removing air and moisture from the lines is essential for efficient operation.
- Connect a vacuum pump to the low-pressure service port using a manifold gauge set.
- Close all valves, turn on the pump, then open the low-pressure valve.
- Run the pump until the gauge reaches approximately -30 inHg, then continue for at least 15 minutes.
- Close the valve and verify that the vacuum holds for at least five minutes, ensuring there are no leaks.
Step 5: Release Refrigerant and Check for Leaks
Once the lines are evacuated, release the refrigerant into the system by opening the high- and low-pressure valves on the outdoor unit.
- Inspect all connections by applying a mild soap solution.
- Watch for bubbles, which indicate a leak. If no bubbles appear after several minutes, the lines are secure.
Step 6: Electrical Wiring
Electrical work is critical for safety and proper system function.
- Install a double-pole circuit breaker in your main panel, sized according to the mini split’s voltage and BTU rating.
- Run appropriate-gauge wire from the breaker to an AC disconnect box near the outdoor unit.
- Use a power whip to connect the disconnect box to the condenser.
- Connect line wires to the “line” terminals, wires to the condenser to the “load” terminals, and ensure all ground wires are securely connected.
Step 7: Weatherproofing and Final Checks
- Seal around all wall penetrations with caulk, leaving a small gap at the bottom to allow moisture to escape.
- Turn on the power at the main panel and AC disconnect.
- Test both heating and cooling functions. The indoor unit should blow warm air when in heating mode and cool air when in cooling mode.
- Listen for unusual noises and ensure the outdoor unit fan is running smoothly.
Common Mistakes to Avoid
Even seasoned DIYers make errors when installing a mini split. Here are the most common pitfalls to watch out for:
- Mounting the indoor unit too low, reducing airflow efficiency
- Forgetting to angle the drain hole downward, leading to water leaks
- Over-tightening or under-tightening flare connections
- Running refrigerant lines with sharp bends
- Skipping the vacuum step on non-precharged units
- Using the wrong wire size for the power supply
How Much Money Can You Save with DIY Installation?
Professional mini split installation typically costs $2,000–$5,000, depending on your region and system size. Doing it yourself can save you thousands, especially if your system is pre-charged. However, factor in the cost of tools like a vacuum pump (if needed), electrical supplies, and any permits your area might require.
Frequently Asked Questions About Installing a Mini Split
Do I need a permit to install a mini split?
In many areas, yes—especially if you’re adding electrical wiring. Check with your local building department.
How long does it take to install a mini split?
For a single-zone system, expect 4–8 hours depending on your experience level.
Can I install multiple indoor units myself?
You can, but multi-zone systems are more complex and often require professional handling of refrigerant.
Do mini splits need maintenance after installation?
Yes. Clean the filters monthly, keep the outdoor unit free of debris, and have it inspected annually.
Closing Thoughts
Learning how to install a mini split is empowering for homeowners who want to save money and gain hands-on experience. With the right tools and preparation, beginners can successfully mount the indoor unit, set up the outdoor condenser, and connect everything safely. While some steps—like handling refrigerant—may require professional help, much of the work is DIY-friendly.
If you’re ready to tackle your first mini split installation, follow this step-by-step guide, avoid the common mistakes, and don’t hesitate to call in a pro for the tricky parts. The result? A comfortable home, lower energy bills, and the satisfaction of completing a major upgrade on your own.