
The Ultimate Whole-Home Renovation Sequence What Order Should You Hire Contractors?
Renovating a residential property is a significant financial and emotional commitment. When property owners picture a successful home overhaul, they usually imagine the finished visual elements: fresh paint on living room walls, custom cabinetry in the kitchen, and brand-new hardwood flooring running through the hallway. However, underneath every successful home transformation is a strict construction sequence that must be followed to avoid costly mistakes. Jumping ahead or calling trade specialists out of order can ruin newly installed materials, double labor expenses, and delay project completion by several weeks or months.
Understanding construction sequencing requires thinking about a house as a series of connected layers. The exterior structure serves as a protective weather shield, while the mechanical infrastructure operates safely behind drywall and decorative finishes. If a pipe leaks or a wire needs to be pulled after drywall has already been painted, cutting into finished surfaces creates unnecessary waste and frustration. By adhering to a logical, step-by-step workflow, homeowners ensure that each trade professional builds upon the work completed before them. This organized approach protects budgets and preserves the overall quality of every upgrade.
Step 1: Securing the Exterior Shield
Before any major work takes place inside a house, the primary building structure must be completely sealed against rain, wind, and outdoor debris. Attempting to start interior wall framing, floor leveling, or electrical work while the roof or exterior cladding has active leaks invites severe moisture damage and structural decay.
Homeowners need to begin by bringing in licensed roofers to inspect, repair, or completely replace the main roof structure. These exterior specialists verify that shingles, underlayment materials, and metal flashing create a durable barrier across the entire upper structure. Once the roof is watertight, qualified siding contractors step in to replace damaged exterior wall panels, install moisture wraps, and seal windows. Completing these two foundational exterior stages guarantees that everything installed on the inside stays dry and protected throughout the entire project.
Step 2: Deflecting Water Away From Foundations
With the main roofing material and exterior wall cladding firmly in place, controlling surface water runoff becomes the next essential priority. Even a newly constructed roof cannot safeguard a foundation if heavy rainwater flows off the eaves and collects around basement walls or concrete slabs.
Installing custom seamless gutters provides a controlled drainage path for roof water. Properly aligned troughs and downspouts route heavy rainwater safely away from exterior walls, footings, and surrounding soil. Booking water drainage work right after primary exterior envelope repairs protects newly installed wall materials from soil back-splash and water stains. It also stabilizes the soil around the house before heavy delivery trucks or internal equipment arrive on site.
Step 3: Interior Demolition and Framing

Once the home is fully protected from weather elements, interior work can safely begin. This phase starts with systematic teardown, where work crews clear away damaged drywall, old insulation, rotted structural studs, outdated cabinets, and non-load-bearing partition walls.
After demolition debris is hauled off, carpentry crews move in to rebuild or modify the internal framing layout. They erect new wall studs, widen doorways, frame closet openings, and reinforce sagging subfloors. Accurate framing establishes the true physical layout for all upcoming mechanical runs. Without straight walls, square corners, and level floor joists, subsequent trade crews will struggle to align pipes, electrical conduit lines, and built-in furniture.
Step 4: Internal Plumbing Rough-Ins
When the interior framing is completely open and accessible, rough mechanical installations can begin. Trade crews run pipes and lines directly through open wall studs and floor joists without needing to cut through existing wallboard or plaster.
At this point, a licensed plumber arrives on site to install main sewer drain lines, vent stacks, and primary water supply lines. They set heavy tub units, locate drain openings for sinks, and run water lines for showers while the stud bays remain open. Running these supply and drain lines early allows for simple adjustments if hidden structural beams block the intended path. It also allows supply lines to pass rough municipal building inspections before walls get closed.
Step 5: Power Networks and Electrical Wiring
Alongside the plumbing team, internal electrical distribution infrastructure must be installed throughout the structure. Modern homes require substantial power capacity to run high-draw appliances, climate units, home offices, and modern entertainment systems.
Experienced electricians enter the project to mount main circuit breaker panels, pull insulated wiring through framed wall studs, and set metal or plastic junction boxes for outlets and switches. They also run dedicated high-voltage circuits for kitchen ranges, clothes dryers, and electric vehicle chargers. Installing electrical wiring while wall cavities are exposed prevents expensive wall patching later and helps ensure full compliance with regional electrical codes.
Step 6: Climate Control and Ductwork Installation

To wrap up the rough mechanical phase, the indoor environment requires proper heating, cooling, and air circulation infrastructure. Climate control systems need clear physical space to route air supply lines throughout every room.
Skilled HVAC services are brought in to design and install rigid supply ducts, flexible return lines, and central air conditioning or furnace units. Mechanics route air ducts through floor joists and drop-ceiling chases, taking care to avoid running into existing water pipes or electrical distribution boxes. Installing large air ductwork while framing remains open ensures optimal airflow distribution without reducing headroom or compromising room layouts.
Step 7: Insulation and Drywall Enclosures
With all rough plumbing lines, electrical runs, and heating ducts inspected and signed off by local building officials, the home structure can finally be closed up. Prior to this point, the interior remains an open skeleton of wood studs and mechanical conduits.
First, installation crews place fiberglass batts, mineral wool, or spray foam insulation inside wall cavities to maximize energy efficiency and soundproofing. Next, drywall teams hang heavy sheets of wallboard across all ceilings and walls. They apply joint compound, tape seams, and sand every surface down to a smooth finish. Hanging drywall converts open framing into defined room spaces, safely enclosing all mechanical runs behind solid walls.
Step 8: Prime and Paint Application
Once the drywall joint compound is completely dry and sanded smooth, interior walls are ready for initial paint applications. Painting at this specific moment saves significant time and effort during the later stages of construction.
Hiring an experienced local painting contractor at this phase allows them to spray wall primer and initial paint coats rapidly without worrying about dripping paint onto finished wood flooring or custom cabinetry. They can treat ceilings, walls, and door frames efficiently in open, empty rooms. Getting initial paint coats onto drywall surfaces early seals the raw wallboard and establishes a clean environment for finish carpenters.
Step 9: Cabinetry, Flooring, and Water Purification
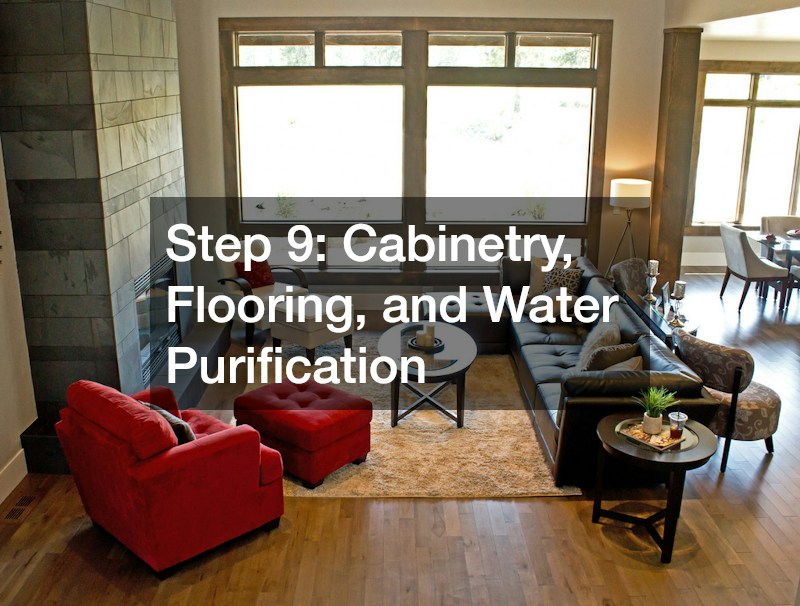
With painted walls in place, the home enters its interior trim phase. Heavy millwork, custom cabinetry, flooring, and specialized water equipment can now be installed onto clean, dry surfaces.
Finish carpenters install kitchen cabinets, bathroom vanities, and built-in shelving units. Shortly after cabinets are anchored to wall studs, flooring teams lay down hardwood, ceramic tile, or luxury vinyl planks. During this phase, homeowners often choose to install a whole home water filtration system near the main incoming water line. Placing filtration equipment at this stage protects new plumbing fixtures and water appliances from mineral scale and sediment from day one.
Step 10: Bathroom Fixtures and Custom Enclosures
Bathrooms require careful sequencing because of their compact size and high concentration of water-sensitive materials. Once wall tile, floor tile, and vanity cabinets are installed, delicate bathroom fixtures can be added.
Plumbing specialists return to install sink faucets, toilets, and shower hardware. Following fixture installation, glass technicians measure and install a custom shower door to seal the bathing area. Installing heavy glass enclosures after tile work and fixture plumbing ensures a precise fit, preventing water leaks that could damage subfloors or surrounding baseboards.
Step 11: Exterior Illumination and Safety
While interior finishing work is being completed, focus moves back out to the surrounding property and outdoor walkways. Proper exterior lighting improves nighttime safety, highlights building architecture, and deters potential intruders.
Homeowners can schedule a professional local exterior lighting installation to position low-voltage accent lights, pathway fixtures, and security floodlights around the home perimeter. Wiring these fixtures directly into the main electrical system allows for easy control from indoor switches or smart control panels. Installing exterior lighting near the end of construction prevents heavy machinery or foot traffic from damaging light fixtures or shallow underground wires.
Step 12: Protecting Structural Investments After Construction

Even after a renovation project ends, keeping the correct trade sequence in mind helps maintain long-term structural integrity. Homeowners often wonder how different trades interact when minor updates or repairs are needed years down the road.
For instance, when replacing a roof in the future, homeowners should work with knowledgeable roofers who understand how shingles integrate with existing wall flashing and drainage eaves. If roofing work is handled carelessly, loose debris can block or damage surrounding gutters, causing water to spill down exterior walls. Recognizing how exterior trade systems connect prevents unnecessary property damage during future maintenance.
Step 13: Aligning Subcontractors for Mechanical Work
Inside the home, mechanical systems also feature shared dependencies that demand proper coordination between trades. When modernizing household infrastructure, understanding which specialist handles each task prevents system overloads and equipment failure.
If a property owner decides to replace their heating or cooling units, consulting with certified HVAC services ensures that air handler capacity matches the square footage of the home. At the same time, licensed electricians must confirm that the main service panel has enough capacity to handle power demands without tripping circuits. Coordinating these two trade teams guarantees both operating efficiency and home safety.
Step 14: Elevating Water Quality and Plumbing Longevity
Water quality directly impacts the lifespan of every pipe, valve, and water-using appliance inside a house. Mineral heavy water can corrode copper lines and cause stubborn scale deposits inside water heaters and fixtures.
When updating residential plumbing systems, working with an experienced plumber helps identify hidden pipe corrosion or pressure issues. Adding a centralized home water filtration system at the main supply entry purifies water before it flows into heating tanks, kitchen taps, or shower heads. Clean water stops mineral buildup inside modern tankless units and extends the overall operating life of the plumbing network.
Step 15: Finalizing Interior and Exterior Finishes
As a major remodeling project approaches its end, touching up aesthetic details ensures every space looks refined and complete. Final cosmetic touch-ups protect initial investments from minor scuffs caused during appliance delivery.
Bringing back a local painting contractor for a final walkthrough allows them to repair small wall scuffs, caulk trim seams, and apply a final coat to interior doors. Meanwhile, in the primary bathroom, checking the rubber seal along the shower door confirms that water stays inside the stall. Addressing these minor items before moving furniture back into the home yields a smooth transition.
Step 16: Architectural Illumination and Exterior Finishing
The final curb appeal of a house depends on how exterior wall materials and outdoor lighting elements work together after dark. Well-planned exterior lighting highlights architectural textures while making paths safe for visitors.
Homeowners can work alongside siding contractors to select exterior wall panels that pair well with exterior lighting fixtures. After siding installation is finished, completing a professional local exterior lighting installation highlights wall textures and improves property security. This thoughtful exterior pairing turns a newly renovated property into an inviting home.
Long-Term Maintenance and Project Success
Completing a whole-home renovation requires patience, organization, and respect for proper contractor sequencing. From early roof repairs to final light fixture installations, every trade professional contributes to building a safe, durable, and comfortable home environment. Working in the correct order prevents damage to expensive finishings, reduces unnecessary labor hours, and eliminates the stress of managing conflicting schedules on the job site.
By understanding how trade specialists rely on one another, property owners can manage construction schedules with confidence, allocate budgets wisely, and avoid expensive rework. Following this proven sequence ensures that every dollar invested in a renovation delivers lasting structural integrity, daily interior comfort, and real property value for many years to come.